Image Files Needed
Transfer the light, dark, and flat images from the telescope computer into your directory.
If your image file names contain spaces, replace the spaces with underscores. Otherwise, applications may hang unexpectedly during processing on Linux machines.
In the terminal, navigate to the directory with your images and type:
rename 's/\s/_/g' ./*.*
If the rename command is not installed, type:
sudo apt update
sudo apt install rename
Information Needed
The following information will be needed later:
- site latitude and longitude
- telescope focal length
- telescope aperture size
- sensor width and height
- sensor pixel size
Some applications will parse this information automatically from the FITS header, while others will expect you to enter it manually.
To view the FITS header:
- Launch Autostar IP.
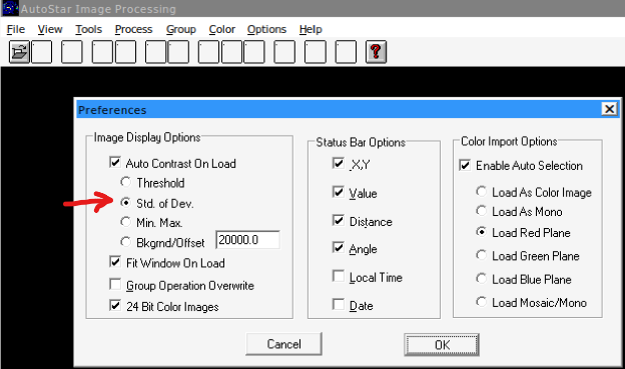
- If launching for the first time, go to Options → Preferences and make sure Std. of Dev. is checked under Auto Contrast on Load.
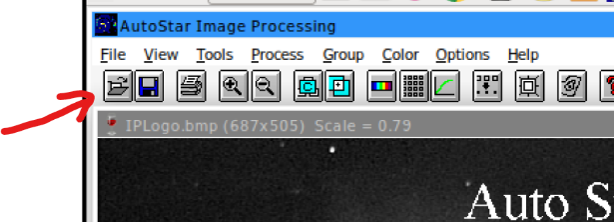
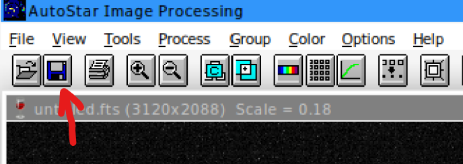
- Load any one of your light images by clicking the Open icon.
- Click Tools → Image Information, then press View FITS header.
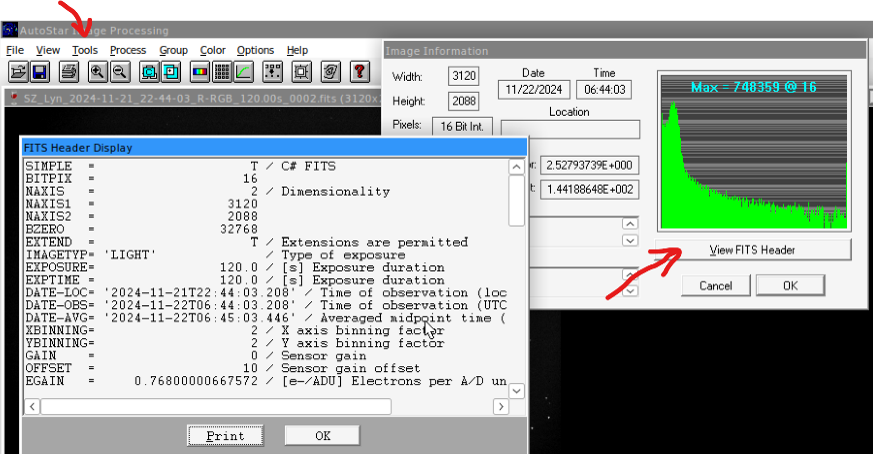
The information in the FITS header has been written by the image acquisition software and should be verified independently for consistency.
Use a plate-solving algorithm to obtain the plate scale and check that the focal length and sensor pixel size correspond to that plate scale.
To verify:
- Go to https://nova.astrometry.net/.
- Follow the directions to upload any one of your image files to the server.
- Wait until the status changes to Success, then click Go to results page.
- Check the plate scale. In the example below, it is 0.664 arcsec/pixel.
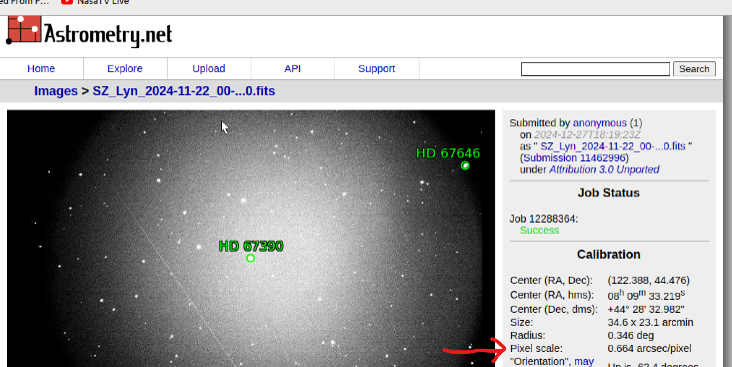
Next, verify that the astrometry plate scale corresponds to the focal length and pixel size by going to https://astronomy.tools/ and choosing Calculators → CCD Calculators.
Make sure the pixel size is adjusted by your binning factor, if any.
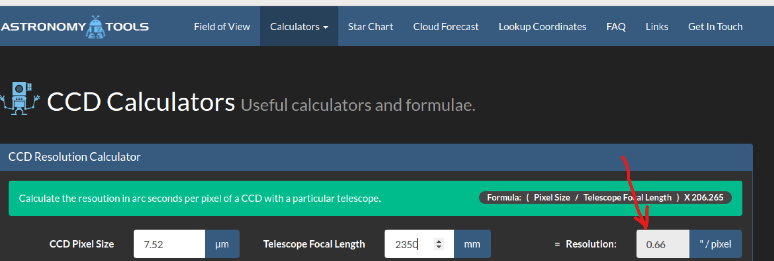
In the example screenshots above, the plate scales match. The pixel size can be trusted, so the plate scale helps confirm that the effective telescope focal length is correct.
In this example, ZWO quotes the pixel size for the ASI2600MM camera as 3.76 microns. At 2×2 binning, this gives a pixel size of 7.52 microns. The astrometry result therefore helps confirm that the effective focal length of the telescope is indeed 2350 mm, as reported in the FITS header.
Image Calibration
The light images must be corrected with dark and flat images.
Dark images help subtract thermally generated counts. Flat images correct for geometrical aberrations such as vignetting.
Preparing the Master Dark Image
- Launch Autostar IP.
- Click Group → New.
- Navigate to your image directory containing the dark images.
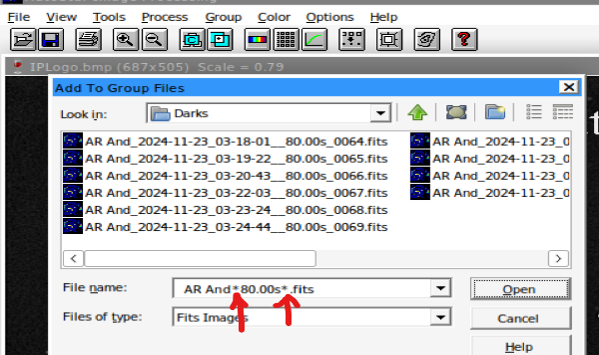
- Use
*characters to filter the selection. Otherwise, you will have to ctrl-click the individual images you want.
For example, to choose all and only images with 80.00s exposure in the file name, type the * characters as shown below. Then shift-click to choose the filtered selection.
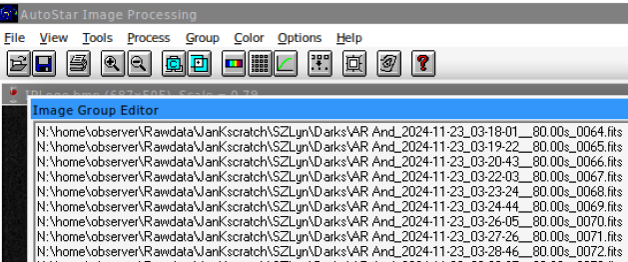
- Click Group → Edit to verify that the correct file selection has been loaded into the group.
In the example below, only files with 80.00s are loaded into the group, as desired.
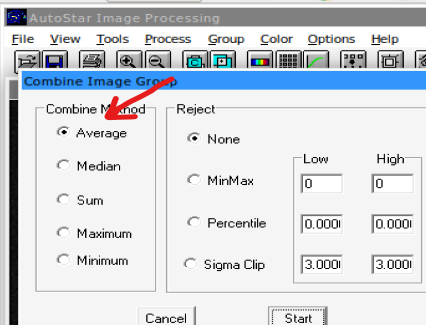
- Click Group → Combine to average the pixel counts across all dark images.
- Save the resulting file as
MasterDarkwith the default extension.
Preparing the Master Flat Image
Repeat the same process as with the dark images.
- Click Group → New.
- Navigate to your image directory containing the flat images.
- Use
*characters to filter the selection. Otherwise, you will have to ctrl-click the individual images you want.
For example, to choose all and only images with G-RGB in the file name, type the * characters as shown below. Then shift-click to choose the filtered selection.
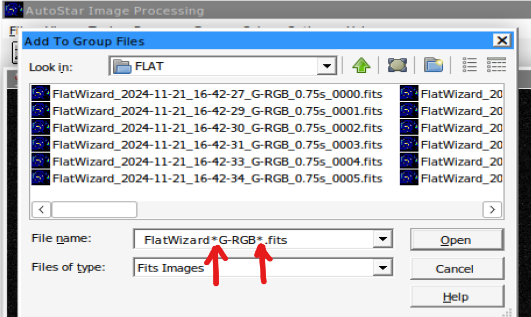
- Click Group → Edit to verify that the correct file selection has been loaded into the group.
In the example, only files with G-RGB are loaded into the group, as desired.
- Click Group → Combine to average the pixel counts across all flat images.
- Save the resulting file as
MasterFlatwith the default extension.
Calibrating the Light Images
Load the light images into a group, then calibrate them as follows.
- Click Group → New.
- Navigate to your image directory containing the light images.
- Use
*characters to filter the selection. Otherwise, you will have to ctrl-click the individual images you want.
For example, to choose all and only images with G-RGB in the file name, type the * characters as shown below. Then shift-click to choose the filtered selection.
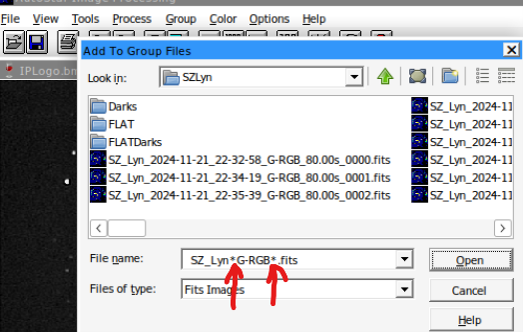
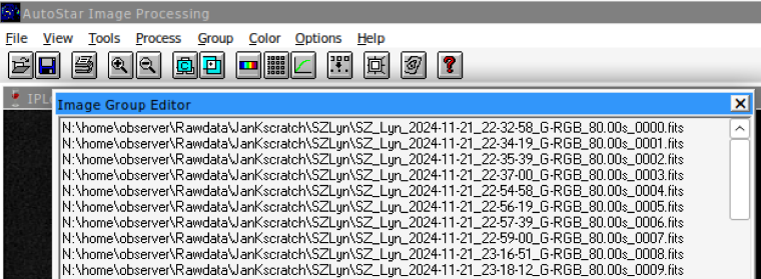
- Click Group → Edit to verify that the correct file selection has been loaded into the group.
In the example below, only files with G-RGB are loaded into the group, as desired.
- Click Group → Calibrate.
- Press the Select buttons to choose your Master Dark and Master Flat files.
- Check the Include boxes for both files.
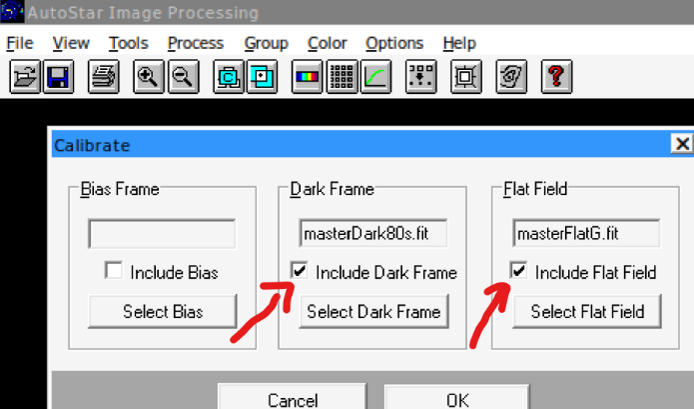
The calibration operation will automatically save the calibrated files into the directory with the light images, prepending each file name with the Calibrated prefix.
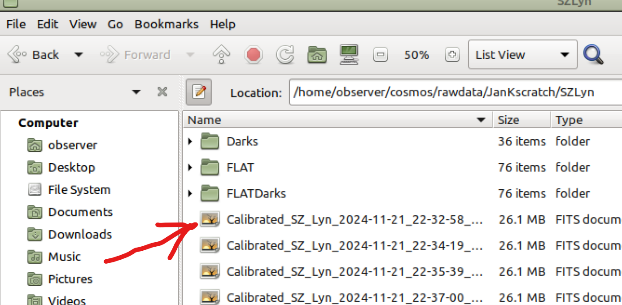
To view the calibrated images, click Group → Examine and use the scroll buttons to browse through the calibrated images.
The calibration files are now ready to be used in the next step described in SOAR Photometry, Part 2.